

Light Trail Photography Principles
What is light trail photography
Light trails have always interested me long before I picked up my first DSLR and started photography. The thought that you could create such perfect lines of light with little more than a camera with a long exposure baffled me, I would scroll through my Instagram in awe of how some of these artists created these light trail photography scenes.
When the time came and I got into photography it all became much more clear to me almost immediately just how easy it was to create these awesome light trail effects especially from traffic lights. Light trail photography, like any other form of photography, takes a lot tweaking the settings and setting up multiple shots until you find the right spot. But, when it all comes together, there are some beautiful masterpieces to be done with little more than a DSLR camera and a tripod. In the following paragraphs, I will detail some easy to follow tips on how to master the basics light trail photography!
A visual tutorial of light trail photography can be found here!
1. Equipment Required
There isn’t one particular type of camera and kit that you’ll need to capture light trails, it can be done with any type of an entry level to an expensive professional DSLR camera. As long as the camera allows you to have control over exposure settings, and allow you to choose longer shutter speeds, which is most fortunate. You will absolutely need a camera that can shoot in either full manual mode and or shutter priority, though I find manual works the best far and wide.
You will need a sturdy tripod, as you physically cannot take any sort of long exposure photograph without steadying your camera with a tripod. How long of an exposure depends on several variables, but either way it is essential to have a tripod no matter the shutter speed.
A remote or shutter release cable is a great investment for light trail photography, and for any long exposure shot in general. These will allow you the most steady shot as you will not have to physically touch the camera at all. It’s all done with the press of a button. If you do not have these you can set your camera shutter timer to 2 or 10 seconds on many cameras. This will still allow you to withhold from touching the camera manually for the shot.
2. The Concept
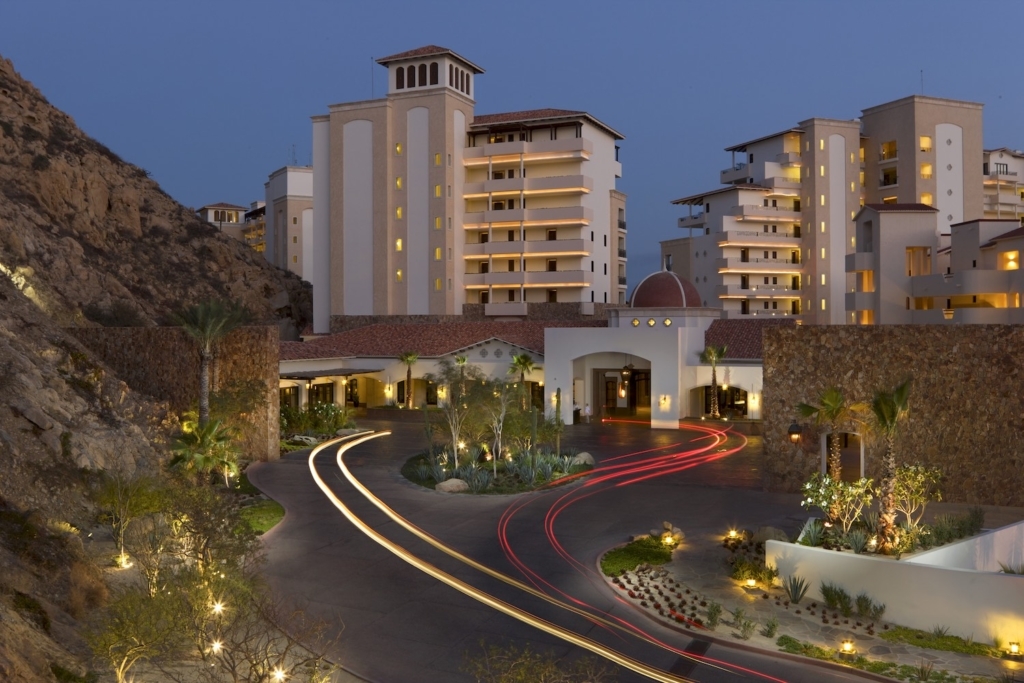
When you look at it simply, light trail photography involves finding a spot where you will see the “light trails” created by cars (or other objects emitting light), setting up your camera onto a tripod to capture the scene, and dialing in a long exposure setting on your camera’s manual mode and shooting at a time when cars will be going by to create the trail of light.
There’s a lot more that goes into it than this (especially time of night, ambient lighting, and speed of traffic) but the primary objective behind this practice is longer exposures that will enable the traffic lights to create lit-up trail lines to move through the picture. So simple, am I right?
For lighting purposes, you will need to shoot either at night or just as the sun is going down (or rising). This just depends on your preference and the type of shot that you’re going for.
You will want to add points of interest to make your light trail photography a little more exciting. So, for setting up the shot itself try to add foreground and background’s that are highlighted but do not overpower the other (unless in certain circumstances). The rule of thirds can often apply to light trail photography, utilizing lines efficiently and utilizing your location with a unique background to go along with the light trail effect itself.
3. Settings
Shutter speed is a great place to start with because it is the most important setting when talking about light trail photography. There is no one size fits all shutter speed that works for every shot, as previously mentioned. A majority of the time you will probably want to ensure that the shutter speed is just slow enough to allow the traffic lighting to pass completely through your frame.
This opposed to having your shutter close halfway through and only capturing half of a light trail. If your shutter remains open for the duration of the light traveling through your frame, you will probably end up with a crisp streak of light that passes through the full frame, which should be the goal. I find that anywhere from 5-30 seconds is the sweet spot depending on your factors, if the light trail is particularly slow-moving or it’s pitch black you may need to add some time to this.
Aperture is something that just needs to be tested in accordance with what the scene is giving you. Typically most light trail photography shots will be somewhere between F8-F22. F8 will be a much sharper image, but this all depends on how you’re combining it with your shutter speed, and how dimly lit the scene is. The key to this is experimentation for sure. You may use M or AV mode depending on your preference.
ISO should remain as low as you can get it, the tripod helps here as well. ISO should be raised or shortened depending on the length of the light trail. Artistry should dictate how high ISO should be raised. Otherwise, if you can help it, keep the ISO on 100 so as to reduce that pesky noise.
4. Small Note on Focus and Light Trail Photography
Focusing must be mentioned as well. In most cases, you will need to shoot in manual focus. The autofocus will not be able to focus correctly on the scene. All the traffic and factors will confuse the autofocus, making it unusable for most cases. Along with manual mode, stabilization should be turned off. Stabilization is not designed for this type of shot and should not be used.
About Antonio
Antonio Cuellar is a commercial photographer who specializes in capturing the architecture and lifestyle of the world's most luxurious hotels and resorts.
Follow


Recent Posts
-

The Art of Precision
02 Des 2020


